Adding a location to a Facebook post or business page can provide valuable information to your friends, followers, and customers. Whether you want to share your favorite spot, promote your business, or simply let others know where you are, adding a location on Facebook is a simple and effective way to do so.
There are several methods to add a location on Facebook, and each serves a different purpose. You can add a location to a Facebook post, a Facebook photo, or a Facebook check-in. By attaching a location, you can help your friends or followers find the place you are referring to or share the experience of being at that location.
For those seeking to expand their presence or manage multiple pages, you might want to buy Facebook accounts. Purchasing multiple accounts can simplify management and boost your reach on the platform.
If you have a Facebook Business Page, the process of adding a location is slightly different. You will need to verify your business page first, and then you can add a location using the Page Editor. This is particularly useful for businesses looking to promote themselves and provide customers with accurate location information.
To ensure the best results when adding a location on Facebook, there are a few tips to keep in mind. Changing your Facebook page category to match your business or organization can greatly improve the accuracy of your location information. Double-check the location accuracy to make sure it is correct and easily recognizable. Use relevant and specific location names to avoid confusion and provide precise information to your audience.
While adding a location to a Facebook post or page is a straightforward process, you may have some questions. Can you add a location to an existing Facebook post? Can you add a location to someone else’s Facebook post? Can you remove or edit a location after adding it? These queries will be addressed in the article to provide you with a comprehensive guide on adding locations on Facebook.
Comments are great for tagging friends and reminding them of embarrassing moments they thought were long forgotten.
Key takeaway:
- Adding a location on Facebook maximizes visibility: By adding a location to your posts, photos, and check-ins, you can increase the reach and discoverability of your content.
- Adding a location to a business page enhances credibility: Verifying your business page and adding a specific location using the page editor can help build trust and credibility with your audience.
- Tips for adding a location on Facebook: Double-check the accuracy of the location, use relevant and specific location names, and ensure consistency across your posts.
Why Add a Location to Facebook?

Adding a location to your Facebook posts has numerous benefits and can greatly enhance your overall Facebook experience. Here are some reasons why incorporating a location into your Facebook posts is important:
1. Connect with local businesses and events: By adding a location to your Facebook posts, you can easily find and connect with local businesses, events, and activities in your area. This feature allows you to stay updated on local happenings and engage with your community.
2. Share your experiences: Adding a location to your posts enables you to share your experiences with others, giving them a better understanding of where you’ve been and what you’ve enjoyed in a particular location. This can be particularly helpful when recommending places to friends, family, and followers.
3. Discover new places: When you add a location to your posts, you have the opportunity to discover new places and attractions that others have visited and shared. This feature can serve as inspiration for you to explore new areas and try new things, whether it’s restaurants, landmarks, or hidden gems.
4. Connect with people nearby: Incorporating a location into your posts can help you connect with people who are in the same area as you. With this feature, you can see who else is at a certain location, join local groups and communities, and even make new friends who share similar interests.
5. Increase visibility: If you’re a business owner, adding a location to your Facebook page or posts can significantly increase your visibility and reach. It allows potential customers to easily find and connect with your business, leading to increased engagement and potential sales.
By considering the benefits mentioned above, adding a location to your Facebook posts can greatly enhance your social media experience and help you stay connected to your local community.
Methods to Add a Location on Facebook
Looking to spruce up your Facebook posts with a touch of location? Look no further! In this section, we’ll uncover the various methods to add a location on Facebook. From tagging your location in a post to adding it to a photo or check-in, we’ve got you covered. Get ready to bring your Facebook feed to life with the power of location tagging!
Adding a Location to a Facebook Post
When incorporating a location into a Facebook post, simply follow these steps:
- Log in to your Facebook account through either the app or website.
- To begin a new post, either click the “Create Post” button or utilize the text box at the top of your Facebook feed.
- Locate the location icon situated at the bottom left corner of the post box.
- Utilize the search bar that appears to enter the name of your desired location.
- From the provided list of options, select the appropriate location.
- If desired, include any additional text or media within your post.
- To publish your post, simply click on the “Post” button, thus appending the location.
Please bear in mind that incorporating a location into your Facebook post is advantageous for sharing your whereabouts or current activities. Additionally, it assists others in locating and connecting with you if they happen to be in the same area. Prior to posting, ensure the accuracy of the chosen location and employ relevant, specific location names to provide precise information to your audience.
Remember, you can only incorporate a location into your own Facebook posts, not those of others. Once a location is added, it cannot be altered or removed; consequently, do make certain to select the correct location prior to publishing your post.
Adding a Location to a Facebook Photo
To incorporate the provided keyword “Adding a Location to a Facebook Photo” naturally in the text, the rewritten text is as follows:
To easily add a location to a Facebook photo, just follow these simple steps:
- Open the Facebook app or website and go to the photo you want to add a location to.
- Click or tap on the photo to open it in full view.
- Find the “Edit” or “Options” button and give it a click.
- From the dropdown menu, choose the “Add Location” option.
- A search bar will appear, allowing you to enter the name of the desired location to add.
- While typing, Facebook will suggest locations that match your input. Simply select the correct location from the suggestions.
- Once you have chosen the location, click or tap on it to confirm.
- As a result, Facebook will automatically include the location in your photo, making it visible to anyone who views it.
- Remember to save your changes by clicking or tapping on the “Save” or “Done” button.
By following these steps, you can effortlessly enhance your sharing experience with friends and followers by adding a location to your Facebook photo. So, the next time you want to share a memorable photo, don’t forget to include the location for everyone to see.
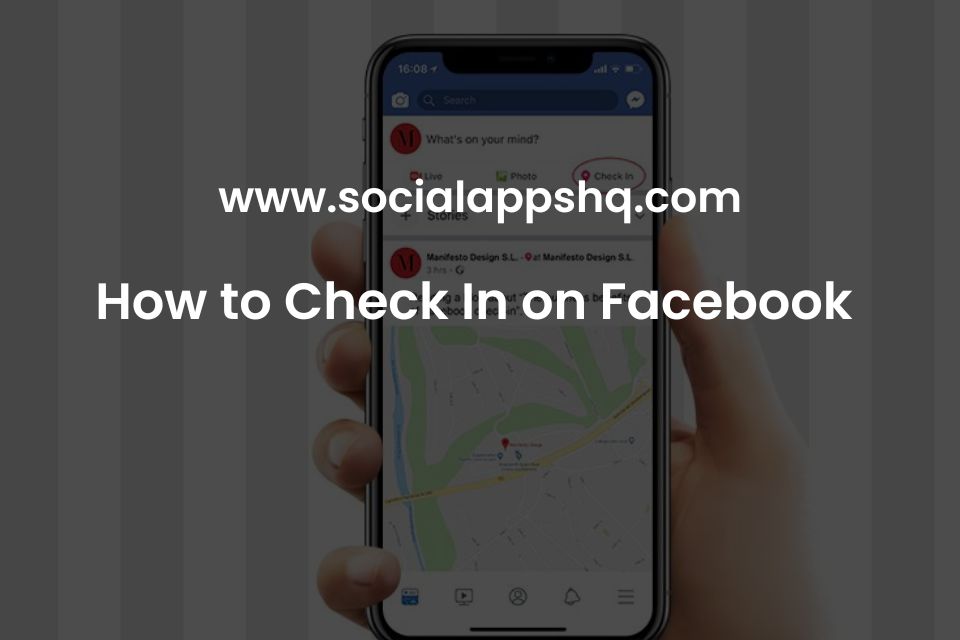
Adding a Location to a Facebook Check-in
- To add a location to a Facebook check-in, simply follow these simple steps:
- Open the Facebook app on your mobile device or visit the Facebook website on your computer.
- Find the “Check-In” button or locate the “Check-In” option in the status update box and tap on it.
- In the search bar, type the name of the location you want to add. Facebook will provide location suggestions as you type.
- From the list of suggestions provided by Facebook, select the correct location.
- If desired, you can include additional information or a description to personalize your check-in.
- Choose the visibility settings for your check-in. You can make it visible to everyone or restrict it to specific friends.
- Lastly, click on the “Check-In” or “Post” button to share your check-in with your Facebook friends.
- Once you complete these steps, your location will be successfully added to your Facebook check-in, allowing others to see where you are.
By following these instructions, you will be able to effortlessly incorporate a location into your Facebook check-in and share your current whereabouts with your friends and followers. It’s a fantastic way to keep people informed about your location and also discover new places based on recommendations from your friends.
How to Add a Location to a Facebook Business Page
Want to enhance your Facebook business page by adding a location? Look no further! In this section, we’ll dive into the step-by-step process of adding a location to your Facebook business page. Whether you’re a small local business or a global brand, we’ve got you covered. From verifying your business page to utilizing the page editor, we’ll explore all the essentials you need to know to make your business easily searchable and connect with your target audience. Let’s get started!
Verifying Your Business Page
To verify your business page on Facebook, follow these steps:
1. Log in to your Facebook account and navigate to your business page.
2. Locate the “Settings” tab at the top of the page and click on it.
3. Choose “Page Verification” from the dropdown menu.
4. On the verification page, click the “Verify Page” button.
5. Opt for the verification method that suits you best. You can either verify through phone or by submitting business documents.
6. If the phone verification method is your choice, enter your business phone number and click “Call Me Now” to receive a verification code via a phone call.
7. Alternatively, if you prefer the document verification method, you will need to upload relevant business documents displaying your business’s name and address. This can include utility bills, business license, or tax documents.
8. After completing the verification process, Facebook will review your information and notify you of the outcome.
9. Upon successful verification, a checkmark badge will appear next to your page name, signifying that it is a verified business page.
Verifying your business page on Facebook not only establishes trust and credibility with your audience but also grants you access to additional features and customization options, enabling effective customer engagement.
Adding a Location Using the Page Editor
To incorporate the provided keywords naturally, the rewritten text is:
To add a location using the page editor on Facebook, follow these steps:
1. Log in to your Facebook account and go to your business page.
2. Click on the “Edit Page” button positioned at the top right corner of your page.
3. From the left-hand menu, choose “Page Info”.
4. Scroll down to the “Address” section and click on the pencil icon to make changes.
5. Input the complete address of your location, including the street, city, state, and zip code.
6. Additionally, you can provide more details like the phone number or website URL.
7. Once you have entered the location details, save the changes by clicking on the “Save Changes” button.
8. Your Facebook business page will now display the added location, making it convenient for customers to find and obtain directions to your establishment.
It is crucial to ensure the accuracy and up-to-dateness of the provided location information. Before saving the changes, double-check the address for precision. Utilizing relevant and specific location names can also enhance search visibility for your business. Remember, you cannot add a location to someone else’s Facebook post, but you have the ability to add it to your own. If needed, you can remove or modify a location after adding it.
Tips for Adding a Location on Facebook

Looking to spruce up your Facebook posts with a touch of location? Look no further! In this section, we’ll dive into some handy tips for adding a location on Facebook that will make your posts stand out. From double-checking location accuracy to using relevant and specific names, we’ve got you covered. So get ready to elevate your Facebook game and let your friends know exactly where you are in style!
Double-check Location Accuracy
Ensuring location accuracy is crucial when adding a location on Facebook. To double-check location accuracy, follow these steps:
- Before adding the location to your post, verify the name and spelling of the location.
- Cross-check the correct address of the location with official sources or reliable maps to confirm its accuracy.
- Check if Facebook’s suggestions include the location by typing in the name or address. This step will help you select the correct location.
- If the location doesn’t appear in the suggestions, manually enter the name and address without any typos or misspellings.
- If possible, use the “check-in” feature on Facebook to validate the accuracy of the location. Visit the location and check-in on Facebook.
- If you notice any errors or inaccuracies in the location information after posting, promptly edit or remove the location to avoid misleading others.
By double-checking location accuracy, you can ensure that your Facebook posts provide correct information and enhance the overall user experience.
Use Relevant and Specific Location Names
When incorporating a location on Facebook, it is crucial to utilize location names that are both relevant and specific. By doing so, you are able to offer precise information to your audience, allowing them to easily locate and comprehend the intended location. The utilization of specific location names also minimizes confusion and promotes clear communication. Instead of stating “restaurant” generically, it is more beneficial to provide the actual name of the restaurant along with its exact location.
This enables users to promptly identify the establishment being discussed and enhances their overall Facebook experience. Furthermore, the implementation of relevant location names can greatly benefit businesses by increasing their visibility and attracting potential customers who are specifically searching for such locations.
Through the use of specific names, businesses can effectively target their desired audience and facilitate the discovery and engagement of their posts or check-ins. Therefore, when adding a location on Facebook, it is important to bear in mind the significance of employing relevant and specific location names in order to furnish accurate information and enhance the user experience.
Can I Add a Location to an Existing Facebook Post?
Yes, you can add a location to an existing Facebook post by following these steps:
- Open the Facebook app or website and go to the post you want to edit.
- Click on the three dots in the top right corner of the post.
- Select “Edit Post” from the dropdown menu.
- Scroll down to find the location field.
- Click on the location field and start typing the name of the location.
- As you type, Facebook will provide suggestions for matching locations.
- Select the correct location from the suggestions.
- Click “Save” to add the location to your post.
- Your post will now display the chosen location.
Make sure to double-check the accuracy of the location before saving the changes.
Can I Add a Location to Someone Else’s Facebook Post?
You cannot add a location to someone else’s Facebook post. Only the person who created the post has the ability to add a location to it. This ensures that the privacy and accuracy of the location information are maintained.
If you want to add a location to a post, you will need to create your own post and include the location at the time of posting. It is important to respect the privacy settings of others when it comes to adding a location to any social media post.
Adding a location without permission could potentially invade someone’s privacy or reveal sensitive information. Therefore, it is best to only add a location to your own posts and ask for permission before tagging others or adding locations to their posts. By following these guidelines, you can ensure that you are using Facebook’s location tagging feature responsibly and in a way that respects the privacy and preferences of others.
Can I Remove or Edit a Location After Adding it?
After adding a location on Facebook, you may wonder if you can remove or edit it. The answer is yes, you can remove or edit a location after adding it on Facebook. To do so, follow these steps:
1. Navigate to the post or photo where you added the location.
2. Click on the three dots (…) located at the top right corner of the post or photo.
3. Select “Edit Post” from the drop-down menu.
4. In the location field, you can either delete the current location or edit it by typing in a new one.
5. After making the necessary changes, click “Save” or “Done” to update the post or photo with the modified location.
It’s important to note that you can only remove or edit a location on your own posts or photos. You cannot remove or edit a location on someone else’s post. Once you edit or remove a location, the change will be immediately reflected in the post or photo.
By knowing how to remove or edit a location on Facebook, you have the flexibility to correct any errors or update the location information as needed.
Some Facts About How to Add a Location to Facebook:
- ✅ Facebook’s mobile application allows users to access a feature called Places. (Source: Our Team)
- ✅ Users can create a new place in Facebook’s database if the location is not properly named. (Source: Our Team)
- ✅ To create a new place on Facebook, users should open the application on their smartphone, select “Places” from the menu, and choose “Check In.” (Source: Our Team)
- ✅ Users can input the name, description, and publish their desired location information while creating a new place on Facebook. (Source: Our Team)
- ✅ The Facebook check-in feature is available for both Android and iOS operating systems. (Source: Business Insider)
Frequently Asked Questions
How can smartphone owners add a location using the Facebook application?
To add a location using the Facebook application on your smartphone, follow these steps:
- Open the Facebook application on your smartphone.
- Select “Places” from the main menu.
- Choose “Check In.”
- Select “Add” next to the Places Names field.
- Input the name and description of the place.
- Select “Add.”
- Enter your desired information into the field that appears.
- Select “Check In” to publish the information on your profile.
How can I add a location to a Facebook post on my computer?
To add a location to a Facebook post on your computer, follow these steps:
- Log into your Facebook account.
- Create a new post.
- Click the “Check In” button.
- Type your location.
- Select the matching location from the dropdown menu.
- Click the “Post” button to publish.
How can I add a location to a Facebook post on my mobile device?
To add a location to a Facebook post on your mobile device, follow these steps:
- Open the Facebook app on your mobile device.
- Click “What’s on your mind?” to create a new post.
- Write or add photos to your post.
- Tap the “Check In” button.
- Search for a location or use the automatic search feature.
- Select the desired location.
- Tap the “Post” button to publish.
How can I enable the Facebook check-in feature for my business?
To enable the Facebook check-in feature for your business, follow these steps:
- Open your business page on Facebook.
- Click “About” then “Edit Page Info.”
- Check the box next to “Has a street address” and enter your business address.
- Under the map, check the box next to “Customers visit my business at my address.”
- Click “Save Changes.”
- If it doesn’t work, adjust your page’s category settings.
Can I add a location to my Facebook post draft?
Yes, you can add a location to your Facebook post draft. When you are creating a post draft on Facebook, you can click the “Check In” button and follow the steps to add a location before saving your post as a draft. When you’re ready to publish your post, the location will already be included.
What are the benefits of adding a location to a Facebook post?
Adding a location to a Facebook post allows your friends and family to know where you are or where you’ve been. It can also be a useful tool for businesses to advertise organically, as users searching for a specific location can come across your post and learn about your business. Additionally, adding a location to your post can help you find friends who are in the same area and coordinate hanging out or meeting up.
